
Contacts > Design custom fields for contacts
Create fields that will appear in the Custom view for all contacts. For example, set up Status and Social Security Number custom fields.
1. Open a contact.
2. Click Custom, and then click Add Custom Fields (or Edit Custom Fields).
3. In the Custom
Field Editor window, add, edit, arrange, and remove fields as desired.
These changes will affect all contacts for all firm members.
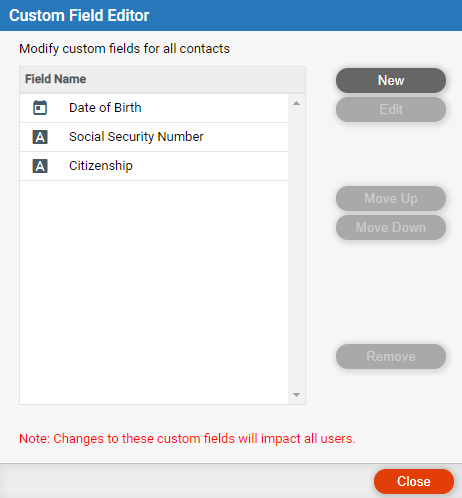
● Add
a new field:

o Label – Text that appears in the Custom view. It doesn't need to be unique.
o Field name – Must be unique. It cannot contain spaces—use underscores instead if you like.
o Field type – Text, memo, number, date, etc.
o Format –
Depending on the field type, select a field format—e.g. for a number field,
choose whether to include commas and a decimal point.
For a drop-down list field, click Add to add or edit the set of allowed
list items. You can add items, edit their names, rearrange them, or delete
them.
● Edit an existing field – Double-click the field and make changes in the window that appears. The type can't be changed.
● Arrange fields – Custom fields can be moved up or down in the list.
 |
Warning: If you remove a field, the field and its data will be permanently deleted from all contacts for all firm members. |
Amicus Cloud (January 2023)
Copyright