Defined user groups enable firm members to quickly assign an appointment, or filter the Tasks main view, to the set of users who are collaborating in a particular area of work. And if file security is enabled for the firm, a firm member can restrict files to the members of a group. For example, the firm might have groups for Real Estate, Litigation, Managing Partners, and Technology Committee.
While each firm member can add and maintain groups from their user profile (see How to manage your user groups), the firm's Amicus administrator has additional control from User Management, as described below.
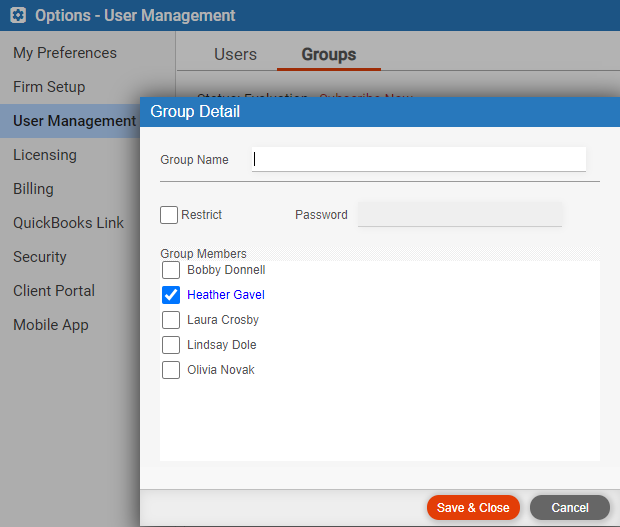
1. Choose Options > User Management, and click New Group under the Groups
tab.
● Set
password restriction: To restrict membership of the group, select
the Restrict option and enter a password. Only
users who know this password will be able to add themselves to the group
and see the membership list.
2. Select members – Select the checkbox next to the name of each user you want in the group.

● Choose Options > User Management, and in the Groups list, click the name of the group you want to work on. You don't need to enter the password of a restricted group in order to open it for editing.
o Edit – Add or remove users, change the group name, restrict or unrestrict the group, or change the password for a restricted group.
o Delete – To delete the group, click Delete. If the group has files assigned, you are prompted to reassign those files to another group you select.
1. Choose Options > User Management and, in the Groups list, click the name of the group you want to delete. You don't need to enter the password of a restricted group in order to open it for deleting.
o Perform this task when no files are in use by any firm members.
o In the group window, click Delete.
o If any
files were restricted to this group: A message appears so you can choose
how to handle them.
2. To see a list of affected files, click Show Files. Ensure that none of these files are being edited by users at this time.
o Choose the group to which you want these files restricted.
o Choose
the firm member you want assigned to a file as the responsible lawyer
if the file's current responsible lawyer is not in the new group.
3. Click Reassign Now.
● Set a user's access and file deletion rights
● Change a user's Amicus login password
● Change a user's Exchange credentials settings
Amicus Cloud (January 2023)
Copyright