
Time & Expenses > Configure a custom accounting template
If the standard accounting templates provided for QuickBooks, PCLaw, or Timeslips are not appropriate for the firm, customize a template to control what is exported when time entries or expenses are posted from Amicus.
● First determine what format (e.g. comma separated values) and which fields in what order are suitable for importing time entries (and optionally expenses) into the firm's accounting application.
● If you don't have an accounting application, you can still customize a template for importing entries into a spreadsheet application such as Excel.
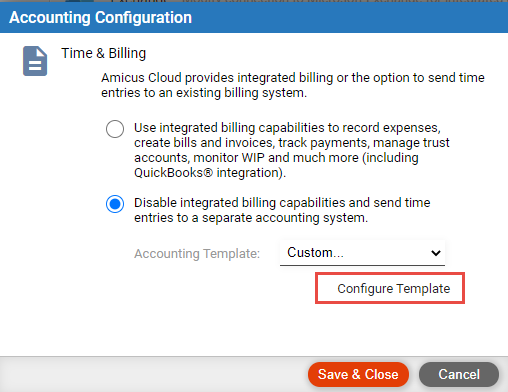
● Choose Options > Setup > Firm Setup and in the
Billing section, click Billing Setup.
● After choosing
to disable integrated billing for the firm, select "Custom..."
as the Accounting Template and click Configure Template.

● Expenses — Whether your accounting application can import expenses, and if so, whether they and time entries are imported from separate text files or together from the same text file.
● Header — Whether you want the first record in the posting computer file to contain the names of the fields selected for exporting.
● Special code — Whether a code is needed at the beginning of each time entry or expense record, and if so, what (e.g. "TIME" for time entries).
● File
naming — Format of the posting computer file: CSV, TXT, or
other. If "other", specify a file extension.
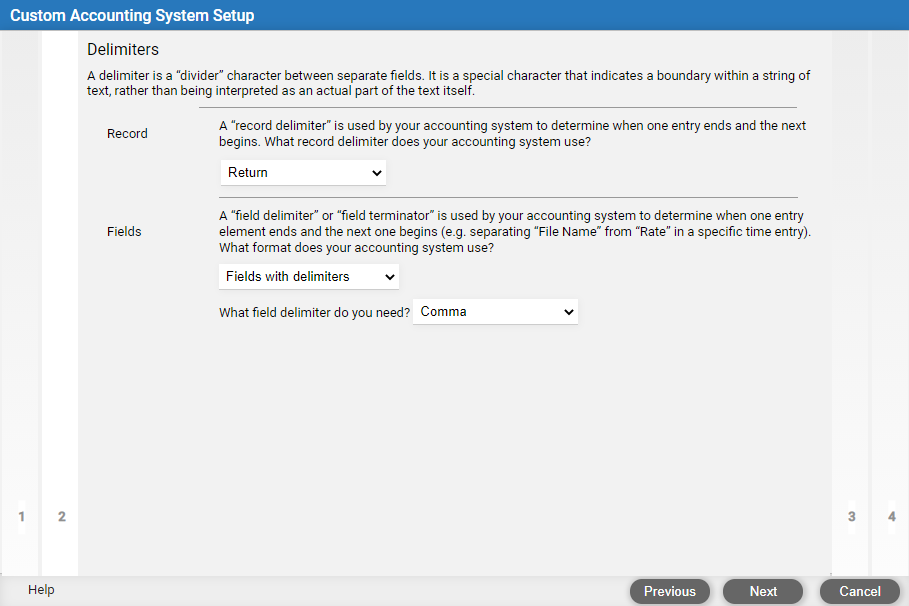
● Record — What character to use as a record delimiter or terminator to distinguish one entry from the next.
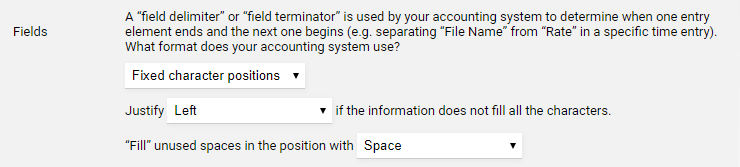
● Fields —
Format with a field delimiter or terminator to separate one field from
the next within each entry. Select a character (such as a comma) to use
as the delimiter.
Or, format with fields starting at fixed character positions. The data
can be justified right or left in each slot. Select a character (such
as a space) to pad out each slot whenever necessary.
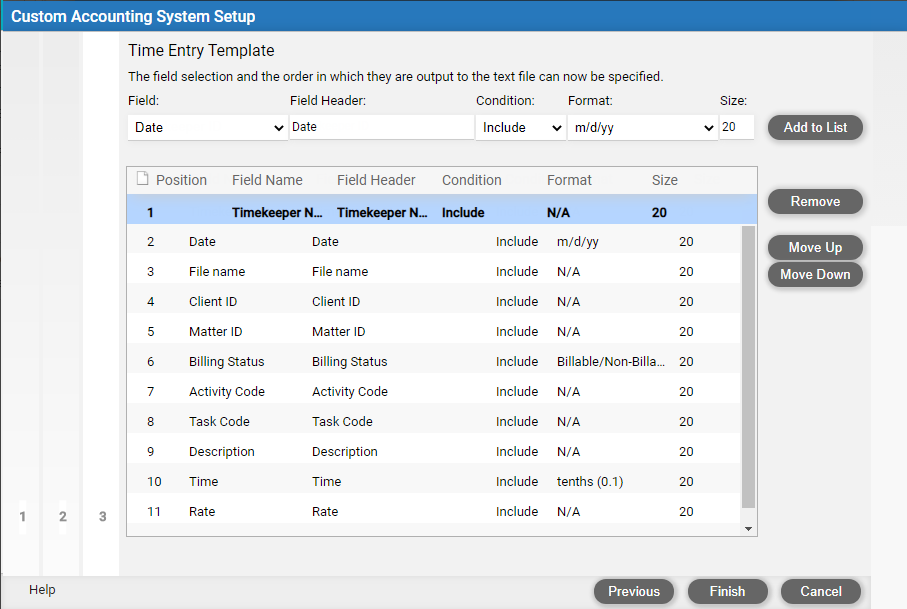
● Fields — After adding the fields you want exported, you can move them up or down in the list so that they are in the desired export sequence.
● Condition — For fields that must contain a value, set the condition to "Required". Amicus will prevent the posting of time entries or expenses that fail this condition. If you make client ID or matter ID required fields, information must be saved in those fields before a file can be saved. If you make activity or task code required fields, information must be saved in those fields before a time entry can be saved.
● Format — For some fields, such as Duration, select an export format (e.g. minutes).
● Size —
If you have chosen to format with fields at fixed character positions,
enter the width of each field slot as required by your accounting system.
For example, the client ID might need to go in a 8-character wide slot,
followed by matter ID in a 5-character wide slot, and so on.

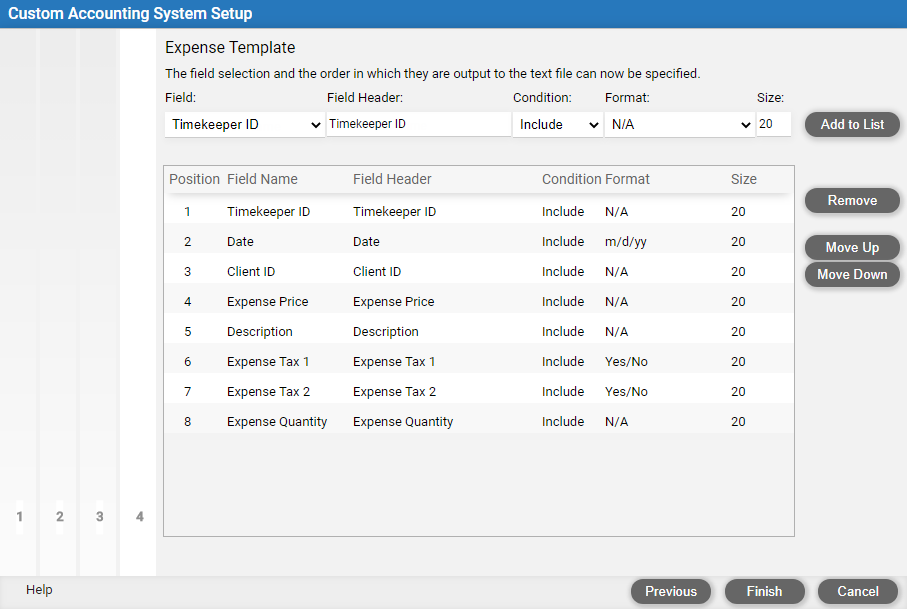
● Expense fields — Depending on your choice on page 1 of the customization wizard, add the expense fields you want exported on page 4 or together with time entries on page 3, or not at all.
 |
Note: "Expense Price" is a calculated price, equal to the amount divided by quantity. |
● We recommend that before going live, you test the effects of your template customization on Amicus files, time entries, and expenses, examine the posted computer files, and test the results of importing to your accounting system.
● Enable time entry/expense posting for the firm
● Post time entries and expenses
● Unpost time entries and expenses
Amicus Cloud (January 2023)
Copyright